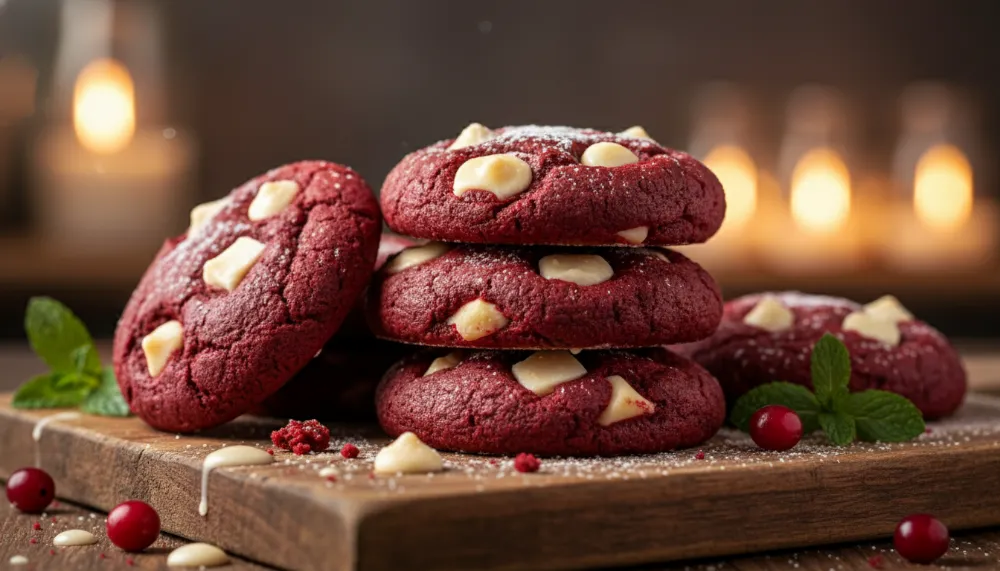
Red Velvet Cookies are the ultimate indulgence, combining the cocoa-infused richness of a classic cake with the chewy, buttery texture of a perfect cookie. These vibrant crimson treats are not just a dessert, they are a statement piece for any holiday platter or bake sale.
Signature Red Velvet Cookies
Ingredients
- 1 2 1/2 cups All-Purpose Flour
- 2 1/4 cup Unsweetened Cocoa Powder
- 3 1 tsp Baking Soda
- 4 1/2 tsp Salt
- 5 1 cup Unsalted Butter, softened
- 6 3/4 cup Granulated Sugar
- 7 3/4 cup Light Brown Sugar, packed
- 8 1 Large Egg
- 9 1 tbsp Buttermilk
- 10 1 tsp White Vinegar
- 11 1 tsp Alcohol-free Vanilla Bean Paste
- 12 2 tbsp Red Food Coloring
- 13 1 1/2 cups White Chocolate Chips
Instructions
- 1 Sift together the flour, cocoa powder, baking soda, and salt in a medium bowl and set aside.
- 2 In a large bowl, cream the softened butter with granulated and brown sugars until light and fluffy.
- 3 Beat in the egg, buttermilk, vinegar, alcohol-free vanilla, and red food coloring until fully combined.
- 4 Gradually add the dry ingredients to the wet ingredients, mixing until just combined. Fold in the white chocolate chips.
- 5 Cover and chill the dough in the refrigerator for at least 1 hour to prevent excessive spreading.
- 6 Preheat your oven to 350°F (175°C) and line a baking sheet with parchment paper.
- 7 Scoop rounded tablespoons of dough onto the sheet, spacing them 2 inches apart. Bake for 10-12 minutes.
- 8 Allow cookies to cool on the pan for 5 minutes before transferring to a wire rack.
The Fascinating History of Red Velvet
To understand the Red Velvet Cookies, one must first look at the long and storied history of Red Velvet itself. The term “velvet” was used as far back as the Victorian era to describe cakes with a particularly fine, soft crumb. This texture was achieved by adding cocoa powder to the batter, which helped soften the proteins in the flour. However, the distinct red color we associate with these treats today was originally a fluke of kitchen chemistry. Historically, cocoa powder was not processed with alkali (non-alkalized), making it quite acidic. When this acidic cocoa reacted with other acidic ingredients like buttermilk and vinegar, it brought out the natural anthocyanins in the cocoa, resulting in a subtle reddish-brown hue.
During the Great Depression, the Adams Extract company saw an opportunity to capitalize on this unique color by marketing red food coloring as a way to enhance the cake’s appearance. This transformed the subtle tint into the brilliant crimson we see in modern Red Velvet Cookies. In later years, particularly during the resource-scarce times of World War II, some bakers even used boiled beet juice to maintain the moisture and color of their cakes without using expensive dyes. Today, the cookie version represents the evolution of this trend, moving from a formal tiered cake to a convenient, handheld indulgence that retains all the flavor profile of the original.
The Science of the Perfect Cookie Texture
Creating the perfect Red Velvet Cookies requires a delicate balance of ingredients to achieve that signature “tang” and chewy texture. Unlike a standard chocolate cookie, which relies heavily on cocoa for its structure and flavor, these cookies use a smaller amount of cocoa to allow the buttermilk and vinegar to shine. The addition of vinegar is crucial, not just for the flavor, but because it reacts with the baking soda to create carbon dioxide bubbles, giving the cookie a slight lift while keeping the interior moist and soft. This interaction is a fundamental principle of baking science that ensures your cookies don’t end up flat or crunchy.
For those looking to streamline their baking process, high-quality equipment is essential. For the most consistent dough, use the Cuisinart 8 Cup Food Processor (https://amzn.to/47Nhbg8) to quickly cream your butter and sugars until they are perfectly light and fluffy. This step is vital because it incorporates air into the fat, which expands during baking to create a tender crumb.
If you find your dough is too warm after mixing, chilling it in the refrigerator is a non-negotiable step. Chilling solidifies the fat, meaning the cookies will spread more slowly in the oven, resulting in a thicker, chewier final product.
Choosing the Right Ingredients
Not all cocoa powders are created equal when it comes to Red Velvet Cookies. For this recipe, it is best to use a natural, non-alkalized cocoa powder rather than a Dutch-processed version. Dutch-processed cocoa has had its acidity neutralized, which means it won’t react as vigorously with the vinegar and buttermilk, potentially leading to a duller flavor and a denser texture. Additionally, the choice of fat matters immensely. Using high-quality unsalted butter allows you to control the salt content precisely, ensuring the sweetness of the white chocolate chips isn’t overwhelmed.
Professional Baking Tips and Tools
Experienced bakers know that the difference between a good cookie and a great one often lies in the precision of the tools used. While many people think of air fryers only for savory dishes, the Cosori 9-in-1 TurboBlaze Air Fryer 6 Qt (https://amzn.to/4hRWmVq) is surprisingly effective for baking small batches of these cookies. The rapid air circulation creates a slightly crisp exterior while keeping the inside perfectly molten. It is an excellent option for those who want just a couple of fresh Red Velvet Cookies without heating up the entire kitchen with a large oven.
Furthermore, when it comes to serving these decadent treats, they pair wonderfully with a thick, creamy beverage. While the cookies are baking, you can use the Ninja BN751 Professional Plus DUO Blender (https://amzn.to/3LCDyNR) to whip up a smooth cream cheese dip or a fresh fruit smoothie to serve alongside. The acidity of a fruit-based drink or the richness of a milk-based shake provides the perfect counterpoint to the cocoa and white chocolate notes in the cookies.
Managing Temperature and Timing
Temperature control is the most common pitfall for amateur bakers. Your butter should be “cool room temperature,” meaning it is soft enough to indent with a finger but firm enough to hold its shape. If the butter is too soft or oily, the cookies will spread into a single giant puddle on the baking sheet. Similarly, the egg should be at room temperature to ensure it emulsifies properly with the creamed butter and sugar. If you use a cold egg, it can cause the butter to seize, resulting in an uneven dough consistency.

Troubleshooting Your Red Velvet Cookies
If your cookies are coming out brown instead of red, the culprit is likely the heat or a lack of acidity. High heat can cause the sugars to caramelize and turn brown, masking the red dye. Ensure your oven is calibrated correctly and that you aren’t overbaking. A Red Velvet cookie should look slightly “underdone” when you pull it out of the oven, as it will continue to firm up on the hot pan. If the flavor is lacking that signature tang, check your buttermilk and vinegar, these provide the acidic backbone that defines the red velvet experience.
Another common issue is the cookies being too dry. This usually happens when the flour is measured incorrectly. Always use the “spoon and level” method rather than scooping the flour directly with the measuring cup, which packs the flour down and leads to using too much. A dry cookie lacks the “velvet” quality that gives this recipe its name. By following these professional guidelines, you ensure a bakery-quality result every single time you bake.
Variations and Creative Twists
Once you have mastered the base recipe, the possibilities for customization are endless. One popular variation is the “Cream Cheese Stuffed” Red Velvet Cookie. To achieve this, freeze small dollops of sweetened cream cheese and wrap the cookie dough around them before baking. The result is a surprise molten center that mimics the traditional pairing of red velvet cake and cream cheese frosting. Another favorite is the “Crinkle” style, where the dough balls are rolled in powdered sugar before baking, creating a beautiful white-on-red cracked effect that is visually stunning.
For those who prefer a deeper chocolate flavor, you can substitute half of the white chocolate chips with dark chocolate chunks. The bitterness of the dark chocolate cuts through the sweetness and adds a complex layer to the flavor profile. Regardless of how you choose to customize them, Red Velvet Cookies remain a timeless classic that appeals to people of all ages. Their vibrant color makes them particularly popular for Valentine’s Day, Christmas, or any celebration where you want to add a pop of color to the dessert table.