Unlock the secrets to a breathtakingly moist and vibrant Green Velvet Cake that combines the regal history of Victorian baking with modern culinary precision. This comprehensive guide provides everything from the chemical science of the velvet crumb to a foolproof professional recipe that will dazzle any crowd.
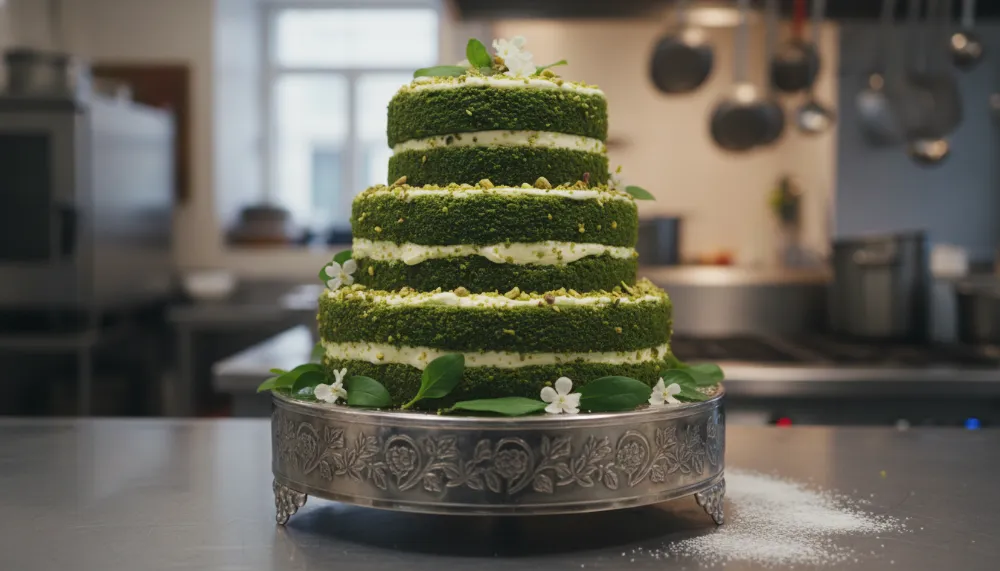
Emerald Green Velvet Cake
Ingredients
- 1 2.5 cups Cake Flour (sifted)
- 2 1.5 cups Granulated Sugar
- 3 1 tsp Baking Soda
- 4 1 tsp Unsweetened Cocoa Powder
- 5 1 tsp Salt
- 6 1 cup Buttermilk (room temperature)
- 7 2 Large Eggs (room temperature)
- 8 1.5 cups Vegetable Oil
- 9 1 tsp White Distilled Vinegar
- 10 1 tsp Non-Alcoholic Vanilla Essence
- 11 2 tbsp Green Food Coloring (Gel preferred)
Instructions
- 1 Preheat your oven to 350°F (175°C) and grease two 9-inch round cake pans with butter or oil and a dusting of flour.
- 2 In a large mixing bowl, sift together the cake flour, sugar, baking soda, cocoa powder, and salt until perfectly combined.
- 3 In a separate bowl or using your Ninja BN751 Blender on low, whisk together the buttermilk, eggs, oil, vinegar, vanilla, and green coloring.
- 4 Gradually add the wet ingredients to the dry ingredients, mixing on medium speed until the batter is smooth and the color is uniform.
- 5 Divide the batter evenly between the prepared pans and tap them on the counter to release any trapped air bubbles.
- 6 Bake for 30-35 minutes or until a toothpick inserted into the center comes out clean.
- 7 Allow cakes to cool in the pans for 10 minutes, then transfer to a wire rack to cool completely before frosting with cream cheese icing.
The Regal History of Velvet Cakes
The Green Velvet Cake is not merely a modern novelty, it is a descendant of the sophisticated “Velvet Cakes” that rose to prominence during the Victorian era. In the mid-to-late 1800s, the term “velvet” was used by bakers to distinguish a new class of cake that featured a much finer, softer, and more delicate crumb than the coarse, heavy pound cakes of the time. This luxury texture was achieved through a revolutionary understanding of food chemistry. Bakers discovered that by introducing acidic components like buttermilk or vinegar into the batter, they could break down the protein strands in the flour, resulting in a cake that felt like velvet on the tongue.
While the Red Velvet Cake became a global phenomenon in the 20th century, particularly through its promotion at the Waldorf-Astoria Hotel, the Green Velvet Cake emerged as its festive and thematic sibling. Historically, the reddish tint of velvet cakes was a natural chemical reaction between non-alkalized cocoa powder and acid. The green variation, however, evolved as a celebration of life, nature, and specific holidays such as St. Patrick’s Day and Christmas. It represents the same commitment to texture but offers a visual palette that is both striking and sophisticated, making it a favorite for pastry chefs who want to tell a story through their desserts.
The Science of the Velvet Crumb: Acidity and Aeration
Achieving the perfect Green Velvet Cake requires an understanding of the interplay between ingredients. Unlike a standard vanilla sponge, a velvet cake relies on a specific pH balance. The inclusion of distilled white vinegar and buttermilk serves two purposes. First, the acid reacts with the baking soda to produce carbon dioxide, which provides the lift and lightness required for a tender crumb. Second, the acid denatures the gluten in the cake flour, ensuring that the finished product is soft rather than chewy.
The choice of fat also plays a crucial role. While many cakes rely solely on butter for flavor, the professional Green Velvet Cake typically uses a combination of butter and vegetable oil. The oil remains liquid at room temperature, which translates to a superior mouthfeel and a cake that stays moist for days. When you use a high-quality tool like the Ninja BN751 Professional Plus DUO Blender to emulsify these fats with the buttermilk and coloring, you create a stable emulsion that results in a perfectly uniform texture without any unsightly streaks or oil separation.
Why Cocoa Powder is Essential
Many people are surprised to find cocoa powder in a Green Velvet Cake recipe. While the amount is small, it is vital for the authentic “velvet” profile. Cocoa adds a subtle depth of flavor that balances the sweetness of the sugar and the tang of the buttermilk. More importantly, it provides a base that allows the green food coloring to appear more organic and deep, rather than neon or artificial. It provides a “mossy” richness to the green hue that defines a professional-grade cake.

Essential Equipment for Bakery-Quality Results
To produce a Green Velvet Cake that looks like it came from a high-end patisserie, you must use the right tools. Precision is the difference between a good cake and a masterpiece. Here are our top recommendations for the serious home baker:
- Ninja BN751 Professional Plus DUO Blender: This is a game-changer for velvet cakes. Use it to blend your liquid ingredients, ensuring the food coloring is perfectly dispersed and the buttermilk and oil are fully emulsified. Check price on Amazon.
- Cuisinart 8 Cup Food Processor: Ideal for aerating your dry ingredients or preparing custom nut-based garnishes for your frosting. Its speed and efficiency are unmatched for prep work. Check price on Amazon.
- Cosori 9-in-1 TurboBlaze Air Fryer: While not for baking the cake itself, this is perfect for roasting pecans or pistachios to add a crunch to your cake’s exterior. Check price on Amazon.
- Rubbermaid Brilliance Glass Storage: Once your cake is sliced, keeping it airtight is the only way to maintain that velvet moisture. These leak-proof containers are the gold standard. Check price on Amazon.
- FoodSaver Vacuum Sealer: If you are making cake layers in advance, vacuum sealing them before freezing prevents freezer burn and keeps the crumb structure intact. Check price on Amazon.
Step-by-Step Techniques for Success
The process of making Green Velvet Cake is as important as the ingredients. Start by ensuring all your refrigerated items, such as eggs and buttermilk, are at room temperature. Cold ingredients do not emulsify properly, which can lead to a dense or greasy cake. When mixing the dry ingredients, sifting is mandatory. Cocoa powder and cake flour are prone to clumping, and a single lump can ruin the aesthetic of your vibrant green interior.
When it comes to the coloring, use gel-based food coloring rather than liquid. Gel is highly concentrated, meaning you can achieve a deep emerald green without adding excess moisture to the batter, which can throw off the chemistry. If you prefer a more natural approach, you can use the Ninja Blender to create a highly concentrated spinach or matcha reduction, though this will slightly alter the traditional flavor profile.
The Art of the Cream Cheese Frosting
A Green Velvet Cake is traditionally paired with a thick, tangy cream cheese frosting. The contrast between the dark green cake and the stark white frosting is visually iconic. To ensure your frosting is stable enough for piping, use full-fat block cream cheese and high-quality unsalted butter. Beat the butter and cream cheese together until they are completely smooth before adding your powdered sugar. For a professional finish, add a pinch of salt to cut through the sweetness and a dash of non-alcoholic vanilla bean paste for those beautiful black flecks.

Professional Variations: Beyond the Classic
Once you have mastered the basic Green Velvet Cake, you can explore professional variations that elevate the flavor profile. Many pastry chefs are now moving toward “Botanical Green” cakes. These utilize the Cuisinart Food Processor to create a fine paste of pistachios or blanched spinach, which provides a natural, earthy green color and a moistness that food coloring cannot replicate.
Another trending variation is the Matcha Velvet. By replacing the cocoa powder with high-grade matcha, you introduce a sophisticated bitterness that pairs beautifully with the tangy buttermilk. For a citrus twist, adding lime zest to the batter and the frosting can transform the cake into a refreshing summer dessert. Regardless of the variation, the core principles of the velvet crumb remain the same, acidity, proper aeration, and the right ratio of fats.
Storing and Preserving Your Masterpiece
Because of its high moisture content, Green Velvet Cake needs careful storage. If the cake is frosted with cream cheese icing, it must be refrigerated. However, refrigeration can dry out cakes if they are not properly protected. This is where the Rubbermaid Brilliance Glass Storage Set becomes essential. These containers provide a true airtight seal that keeps the moisture inside the cake slices.
For long-term storage, the FoodSaver Vacuum Sealer is your best friend. You can freeze individual slices or even whole unfrozen layers. The vacuum sealing process removes oxygen, which is the primary cause of staleness and flavor degradation. When you are ready to serve, simply thaw the cake in the refrigerator while still sealed to prevent condensation from forming on the surface of the cake.
Troubleshooting Common Baking Errors
If your Green Velvet Cake doesn’t turn out perfectly the first time, don’t worry. Here are some common issues and how to fix them. If your cake is too dry, you likely overbaked it or used too much flour. Always use the “spoon and level” method for measuring flour rather than scooping directly from the bag. If your cake has a sunken center, you may have opened the oven door too early, causing a sudden temperature drop, or your baking soda may be expired.
If the color is brownish rather than green, it is usually because too much cocoa powder was used or the oven temperature was too high, causing the exterior to caramelize excessively. Stick to the 1 teaspoon of cocoa recommended in the recipe card to ensure the green remains vibrant. Finally, if the frosting is too runny, ensure your butter and cream cheese were not over-softened before mixing, and consider chilling the frosting for 30 minutes before attempting to frost the cake.