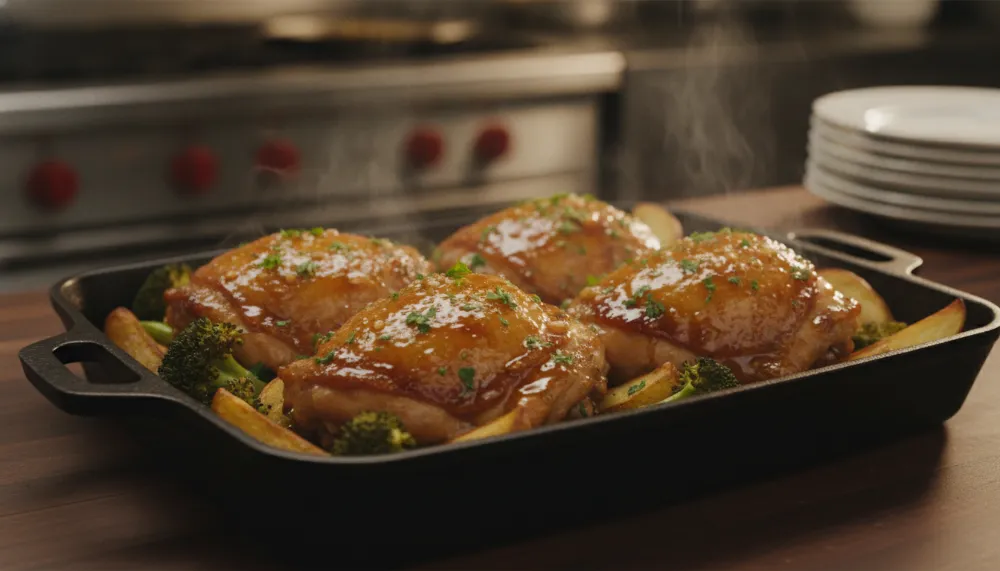
This Honey Garlic Chicken Thigh Bake delivers succulent meat and a finger-licking, caramelized glaze that transforms simple pantry staples into a gourmet weeknight feast. It is the ultimate balance of sweet honey and pungent garlic, roasted to perfection in a single pan for effortless cleanup.
Honey Garlic Chicken Thigh Bake
Ingredients
- 1 8 Bone-in skin-on chicken thighs
- 2 1/2 cup Organic honey
- 3 4 tbsp Low-sodium soy sauce
- 4 6 cloves Garlic, minced
- 5 1 tbsp Apple cider vinegar
- 6 1 tsp Freshly grated ginger
- 7 1/2 tsp Toasted sesame oil
- 8 1/4 cup Chicken broth
Instructions
- 1 Preheat oven to 400°F (200°C). Pat chicken thighs dry with paper towels to ensure crispy skin.
- 2 In a bowl, whisk honey, soy sauce, garlic, vinegar, ginger, and broth until combined.
- 3 Sear chicken in a hot skillet, skin-side down, for 3 minutes until golden. Transfer to a baking dish.
- 4 Pour the honey garlic mixture over the chicken. Bake for 25-30 minutes, basting every 10 minutes.
- 5 Switch to broil for the final 2 minutes for a deep caramelized finish. Rest for 5 minutes before serving.
⚡ Nutrition Facts (Per Serving)
The Cultural Resonance of Honey Garlic Chicken
The Honey Garlic Chicken Thigh Bake is more than just a meal, it is a testament to the beautiful evolution of fusion cuisine. Emerging from the vibrant culinary landscape of Ontario, Canada, this flavor profile bridged the gap between traditional Cantonese cooking and Western preferences. By combining the umami depth of soy sauce with the intense sweetness of honey and the aromatic bite of garlic, a new standard for comfort food was born. This dish represents the “fakeaway” movement, allowing home cooks to achieve restaurant-quality results with accessible pantry staples.
Why Chicken Thighs are the Professional Choice
When preparing a Honey Garlic Chicken Thigh Bake, the choice of meat is paramount. While many lean toward chicken breasts for perceived health benefits, professional chefs almost always opt for thighs. Bone-in, skin-on thighs provide a protective barrier that prevents the meat from drying out under the intense heat required to caramelize the honey. The higher fat content in dark meat ensures a succulent, juicy texture that balances the sticky glaze perfectly. Furthermore, the presence of the bone adds a deeper mineral flavor to the surrounding meat during the baking process, creating a more complex flavor profile.
Recommended Kitchen Essentials for the Perfect Bake
To achieve that signature crispy skin and even glaze, having the right tools is essential. I highly recommend the Cosori 9-in-1 TurboBlaze Air Fryer 6 Qt (https://amzn.to/4u10Uhp) for those who want a faster, high-heat convection finish. Its precise heating ensures that the honey doesn’t burn while the chicken cooks through. For larger family batches, the Instant Vortex 6-Quart XL Air Fryer (https://amzn.to/48Sgy6q) provides the capacity needed for a full sheet pan experience in a compact footprint. If you prefer the visibility of your cooking process, the Ninja Crispi 4-in-1 Glass Air Fryer (https://amzn.to/3PtuOMo) is an exceptional choice for monitoring that perfect caramelization level.

Mastering the Science of the Glaze
The success of a Honey Garlic Chicken Thigh Bake rests entirely on the Maillard reaction, the chemical interaction between amino acids and reducing sugars that gives browned food its distinctive flavor. Because honey is highly concentrated in sugar, it is prone to burning if not managed correctly. The addition of chicken broth and apple cider vinegar serves a dual purpose: they provide the necessary acidity to balance the sweetness and lower the concentration of sugar just enough to allow the chicken to reach a safe internal temperature of 165°F before the glaze turns bitter. Using a high-quality prep tool like the Hamilton Beach Electric Vegetable Chopper (https://amzn.to/4eHJUs1) ensures your garlic is minced to a uniform size, preventing smaller bits from burning while larger pieces remain raw.
Step-by-Step Culinary Breakdown
1. The Preparation and Searing Phase
Never underestimate the power of a dry surface. Before your chicken thighs even touch the pan, they should be patted bone-dry. This allows the heat to immediately begin crisping the skin rather than steaming away residual moisture. A quick sear in a heavy skillet before moving to the baking dish locks in the fats and jumpstarts the browning process. If you are preparing components for a side smoothie or sauce, the Ninja NutriPlus Personal Blender (https://amzn.to/4dwIwau) is a great companion for emulsifying marinades or creating a quick ginger paste.
2. The Basting Cycle
Basting is the secret to that thick, glossy, lacquer-like finish. Every ten minutes, use a spoon or brush to coat the chicken in the accumulating juices. This layering effect builds up the honey garlic coating, creating a multi-dimensional texture that is both chewy and crisp. If you prefer a slow-cook approach for maximum tenderness, utilizing the Crock-Pot 7-Qt Oval Slow Cooker (https://amzn.to/4tVCfuI) is an excellent alternative, though you will need a quick 5-minute broil at the end to set the glaze.
3. Resting for Maximum Juiciness
Once the Honey Garlic Chicken Thigh Bake comes out of the oven, it must rest. During baking, the muscle fibers in the chicken contract and push juices outward. By letting the chicken sit for five to seven minutes, those fibers relax, allowing the savory juices to redistribute throughout the meat. This ensures that every bite is as moist as the last.

Flavor Variations and Global Inspirations
While the classic honey garlic profile is legendary, you can easily adapt this bake to suit different palates. For a citrus twist, add the zest of two lemons and replace the chicken broth with fresh lemon juice. This creates a bright, acidic contrast to the rich honey. If you enjoy a bit of heat, a teaspoon of red pepper flakes or a tablespoon of sriracha can transform the dish into a “Sweet and Spicy” honey garlic masterpiece. To keep the meal prep efficient, use the NutriBullet 600W Personal Blender (NBR-0601) (https://amzn.to/4wq1qaG) to quickly blend your liquid ingredients into a perfectly smooth emulsion before pouring it over the chicken.
Pairing Your Honey Garlic Chicken
To balance the intensity of the glaze, serve your chicken with neutral, high-fiber sides. Jasmine rice is the traditional choice as it excels at soaking up the extra sauce. For a lower-carb option, roasted cauliflower or steamed broccoli florets offer a refreshing crunch. If you are hosting a brunch or early dinner, a cup of fresh coffee from the Keurig K-Express Coffee Maker (https://amzn.to/3RvuSf5) provides a bitter contrast that cleanses the palate between rich bites of glazed chicken.
Storage and Reheating Tips
This dish is a meal prepper’s dream. The flavors actually deepen overnight as the garlic continues to infuse the meat. Store leftovers in an airtight container for up to four days. When reheating, avoid the microwave if possible, as it can make the skin rubbery. Instead, place the chicken back in an air fryer or a 350°F oven for 8-10 minutes. This will re-crisp the skin and return the honey glaze to its original glossy state. For those who utilize pressure cooking for meal prep, the Instant Pot Duo 7-in-1 Electric Pressure Cooker (6-Qt) (https://amzn.to/4dkcMnT) is fantastic for quickly cooking the chicken before a final glaze application.
Troubleshooting Common Baking Issues
If your sauce is too thin at the end of the baking time, do not worry. Simply pour the pan liquids into a small saucepan and simmer over medium heat for 5 minutes until reduced by half. Conversely, if the sauce is darkening too quickly, tent the baking dish with aluminum foil. This allows the chicken to continue cooking through without the honey reaching its burning point. Remember, the goal is a deep mahogany color, not a charred black finish.