Making rich and velvety Homemade Chocolate Truffles is one of the most rewarding skills any home baker can master, offering a level of luxury that far surpasses store-bought alternatives. By understanding the simple science of emulsifying cream and chocolate, you can create a world-class dessert right in your own kitchen.
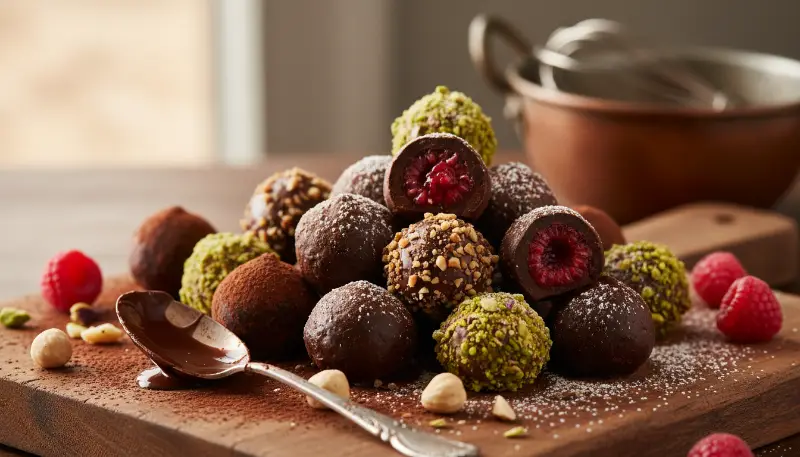
Luxury Silk Homemade Chocolate Truffles
15 MIN
5 MIN
24 PERS
Ingredients
- 1 8 oz high-quality dark chocolate (60% cocoa), finely chopped
- 2 1/2 cup heavy whipping cream
- 3 1 tbsp unsalted butter, softened
- 4 1 tsp alcohol-free vanilla flavoring
- 5 1/2 cup unsweetened cocoa powder for coating
Instructions
- 1 Place finely chopped chocolate and butter in a heat-proof glass bowl
- 2 Heat heavy cream in a small saucepan until simmering, then pour over chocolate
- 3 Let sit for 5 minutes, add vanilla, then stir gently until smooth and glossy
- 4 Chill in the refrigerator for at least 2 hours until firm
- 5 Scoop teaspoon-sized portions, roll into balls, and coat in cocoa powder
The History and Appeal of the Homemade Chocolate Truffle
The origin of the chocolate truffle is a tale of culinary serendipity. Legend has it that in the late 19th century, an apprentice to the legendary French chef Auguste Escoffier accidentally poured hot cream into a bowl of chopped chocolate rather than a bowl of sugared eggs. As the mixture hardened, the chef realized he could shape the paste into rough spheres. When rolled in cocoa powder, these rustic balls resembled the expensive fungus truffles unearthed in the forests of France and Italy, thus giving birth to the name Homemade Chocolate Truffles as we know them today.
Since that accidental discovery, Homemade Chocolate Truffles have become the gold standard for confectionary elegance. Unlike molded chocolates, truffles celebrate a handcrafted, organic look. Their appeal lies in the contrast between the slightly bitter, dusty coating of cocoa and the rich, melting interior. To achieve this at home, you need to understand the science of the ganache, which is the heart and soul of any truffle. When you combine chocolate and cream, you are creating an emulsion, a stable mixture of fat and water that should remain smooth rather than separating.
Essential Equipment for the Perfect Batch
Before you begin your journey into Homemade Chocolate Truffles, having the right tools is essential. While you can chop chocolate by hand, using a high-quality food processor can save time and ensure a uniform texture. For the smoothest possible ganache, especially when incorporating fruit juices or reduced broths, a powerful blender is your best friend. We recommend the Ninja BN751 Professional Plus DUO Blender because its 1000W motor can emulsify even the most stubborn ingredients into a silky paste.
Furthermore, if you are planning on making a large batch of savory truffles where you might need to crisp up some beef garnishes, the Cosori 9-in-1 TurboBlaze Air Fryer 6 Qt is excellent for rendering beef fat and creating crispy beef bits without the mess of a stovetop. For general preparation and getting that chocolate finely minced, the Cuisinart 8 Cup Food Processor is a meal prep essential that handles chocolate blocks with ease.

Ingredient Deep Dive: Quality and Substitutions
When making Homemade Chocolate Truffles, the quality of your ingredients is the single most important factor. Since there are only a handful of components, there is nowhere for poor quality to hide. You should always opt for chocolate with a high cocoa butter content. Avoid standard chocolate chips found in the baking aisle, as these often contain stabilizers and paraffin wax designed to help them hold their shape under heat, which prevents them from melting into a truly smooth ganache.
For those following strict dietary guidelines, it is easy to adapt this recipe without sacrificing flavor. Many traditional truffle recipes call for rum, champagne, or liqueurs. However, you can achieve incredible complexity by substituting alcohol with vibrant liquids. For a Zesty Orange variation, use orange juice concentrate. For a festive Spiced Apple version, use apple juice that has been reduced over low heat to concentrate its natural sugars. These liquids provide a bright acidity that cuts through the richness of the heavy cream.
The Savory Umami Revolution: Beef Broth and Chocolate
While most people think of Homemade Chocolate Truffles as strictly sweet, the world of artisanal chocolate has embraced savory elements. Salted caramel was just the beginning. Today, high-end chocolatiers are using umami-rich ingredients to enhance the depth of dark chocolate. In keeping with our no-pork, no-alcohol requirements, we suggest a sophisticated savory-sweet truffle using a beef broth reduction.
By simmering high-quality beef broth until it reaches a syrupy, glaze-like consistency, you create a liquid gold that is packed with savory notes. When a tablespoon of this reduction is added to your ganache, it acts similarly to salt, enhancing the bitterness of the cocoa and making the chocolate taste “more like chocolate.” To finish these unique Homemade Chocolate Truffles, roll them in finely crumbled, air-fried beef bacon or beef jerky pulses mixed with sea salt. The result is a complex, adult confection that surprises and delights the palate.

Stability and Texture: Using Beef Gelatin
One challenge with Homemade Chocolate Truffles is their tendency to soften at room temperature, especially in warmer climates. If you are gifting these or setting them out for a party, you may want a sturdier structure. Instead of using pork-based stabilizers, which are common in commercial candy making, you can use **beef gelatin**. Beef gelatin provides a clean, neutral set that allows the truffle to maintain its shape while still melting instantly upon contact with the tongue.
To use this method, bloom a teaspoon of beef gelatin in a small amount of cold apple juice or water. Once your cream is heated to a simmer, stir in the bloomed beef gelatin until fully dissolved before pouring it over your chopped chocolate. This small addition makes the Homemade Chocolate Truffles much easier to handle during the rolling process and ensures they look professional and polished on a serving platter.
Storage and Presentation
Proper storage is vital to maintain the delicate texture and prevent the chocolate from absorbing odors from the refrigerator. We highly recommend the Rubbermaid Brilliance Glass Storage Set of 9 for this purpose. These containers are completely leak-proof and airtight, ensuring your Homemade Chocolate Truffles stay fresh for up to two weeks. If you are making a massive batch to enjoy over several months, the FoodSaver Vacuum Sealer Machine is a game-changer, preventing freezer burn and keeping the chocolate’s volatile aromas intact.
When it comes to presentation, variety is key. You can roll your truffles in more than just cocoa powder. Try crushed pistachios, toasted sesame seeds, or even a dusting of beet powder for a vibrant red hue without the need for artificial dyes. Arrange them in small paper liners inside a decorative box for a gift that looks like it came from a high-end boutique in Paris.
Can I use milk chocolate for truffles?
Yes, you can use milk chocolate, but because it has a lower cocoa content and higher sugar and milk solids, you must reduce the amount of heavy cream. For milk chocolate Homemade Chocolate Truffles, use a 3:1 ratio of chocolate to cream to ensure they set properly.
Why did my ganache separate and look oily?
This usually happens if the cream was too hot or if you stirred the mixture too vigorously. This causes the fat to break away from the solids. To fix it, whisk in a teaspoon of room-temperature heavy cream or a tiny splash of apple juice until the emulsion comes back together.
How long do Homemade Chocolate Truffles last?
When stored in an airtight container in the refrigerator, they will stay fresh for about 2 weeks. For longer storage, you can freeze them for up to 3 months, though the texture may change slightly upon thawing.
Can I make these without a stove?
Absolutely. You can heat the cream in a microwave-safe bowl in 30-second intervals until it just starts to bubble. Then, proceed with pouring it over your chocolate as usual. The key is to avoid overheating the cream.