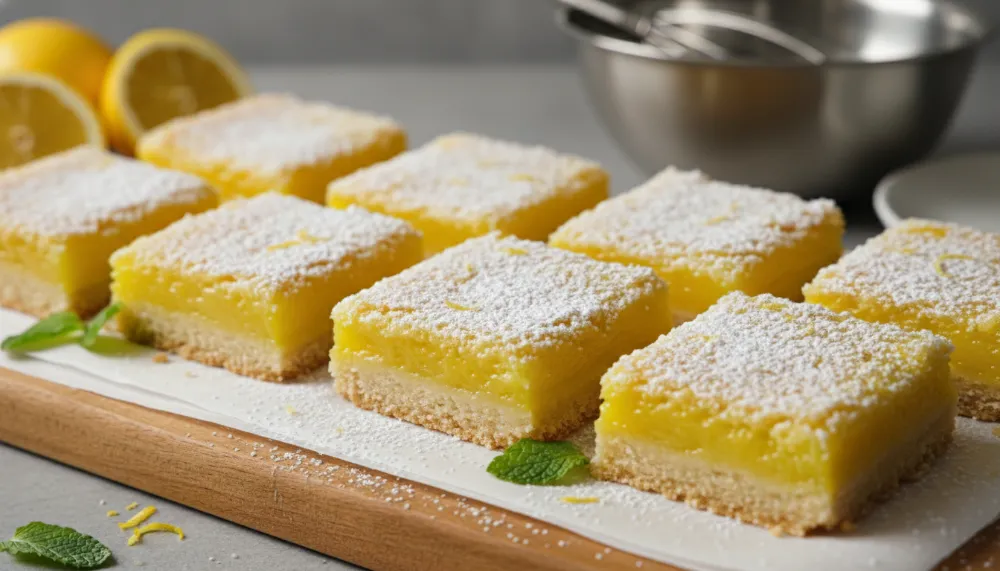
These Classic Lemon Bars with Shortbread Crust are the perfect marriage of a buttery, crumbly base and a sharp, citrusy custard that melts in your mouth. Whether you are hosting a summer garden party or looking for a bright pick-me-up, this recipe delivers the ultimate balance of sweet and tangy perfection.
Classic Lemon Bars
Ingredients
- 2 cups All-purpose flour
- 1/2 cup Granulated sugar (crust)
- 1 cup Unsalted butter (cold, cubed)
- 1/4 tsp Sea salt
- 6 Large eggs (room temperature)
- 3 cups Granulated sugar (filling)
- 1 cup Fresh lemon juice
- 2 tbsp Lemon zest
- 2/3 cup All-purpose flour (filling)
Instructions
- Preheat your oven to 350°F (175°C) and grease a 9×13 inch baking pan or line it with parchment paper.
- In a food processor, pulse flour, 1/2 cup sugar, and cold butter until the mixture resembles coarse crumbs. Press firmly into the bottom of the prepared pan.
- Bake the crust for 20 minutes or until lightly golden brown.
- While the crust bakes, whisk together eggs, 3 cups sugar, lemon juice, lemon zest, and 2/3 cup flour until smooth and no lumps remain.
- Pour the lemon filling over the warm crust and return to the oven for 30-35 minutes until the center is set.
- Let cool completely in the pan before refrigerating for at least 2 hours. Dust with powdered sugar before slicing.
The Fascinating History of the Classic Lemon Bar
The Classic Lemon Bars with Shortbread Crust as we know them today are a relatively modern American invention, though their roots stretch back centuries into European culinary traditions. The dessert is essentially a reimagining of two classic components: Scottish shortbread and English lemon curd. Shortbread, which dates back to 12th-century Scotland, was originally a twice-baked bread roll that eventually evolved into a sweet, buttery biscuit by the 16th century. Lemon curd, on the other hand, originated in 19th-century England as a spread for afternoon tea, though early versions were quite different, often involving curdled cream rather than the smooth egg custard we enjoy now.
The first widely recognized recipe for these bars was published on August 27, 1962, in the Chicago Daily Tribune. A home cook named Eleanore Mickelson submitted the recipe for a favorite recipe contest, winning just five dollars for her contribution. However, it was the 1963 publication of Betty Crocker’s Cooky Book that truly popularized the Classic Lemon Bars with Shortbread Crust, standardizing the rich, tangy filling and ensuring it became a staple at bake sales and family gatherings across North America.

Selecting the Best Ingredients for Success
To achieve a professional-grade Classic Lemon Bar, the quality of your ingredients is paramount. First and foremost, you must use fresh lemons. Bottled lemon juice contains preservatives that add a metallic aftertaste and lack the bright, floral notes of fresh citrus. When selecting lemons, look for those that feel heavy for their size and have a thin skin, as these are typically the juiciest. If you prefer a milder, sweeter flavor, you can use Meyer lemons, though the traditional Classic Lemon Bars with Shortbread Crust usually call for Eureka or Lisbon lemons for that signature tart kick.
The butter in the shortbread crust should be high-quality and very cold. Cold butter ensures that as it melts in the oven, it creates tiny pockets of steam, resulting in a light and flaky texture rather than a greasy one. For the flour, a standard all-purpose flour works best to provide the structure needed to hold the heavy lemon custard. Since we are avoiding alcohol-based extracts, I highly recommend using pure vanilla bean paste if you wish to add depth to your crust, the seeds provide a beautiful aesthetic and a concentrated flavor that synthetic extracts cannot match.
Essential Tools for Perfect Lemon Bars
Investing in the right kitchen equipment can make the difference between a messy kitchen and a streamlined baking experience. Here are my top professional recommendations for mastering this recipe:
- Cuisinart 8 Cup Food Processor: https://amzn.to/47Nhbg8 (Why Perfect: Fast chopping and slicing, meal prep essential. It is the absolute best tool for cutting cold butter into flour for that perfect shortbread texture.)
- Ninja BN751 Professional Plus DUO Blender: https://amzn.to/3LCDyNR (Why Perfect: 1000W motor, perfect for creating smooth fruit purees if you decide to try a raspberry or passion fruit variation.)
- Cosori 9-in-1 TurboBlaze Air Fryer 6 Qt: https://amzn.to/4hRWmVq (Why Perfect: While not for the bars themselves, this roasts chickpeas and vegetables perfectly for the savory meal you serve before dessert.)
- Rubbermaid Brilliance Glass Storage Set of 9: https://amzn.to/4oD0YkY (Why Perfect: Perfect for meal prep storage, leak-proof, and stackable. These are ideal for keeping your lemon bars fresh in the refrigerator without absorbing other odors.)
- FoodSaver Vacuum Sealer Machine: https://amzn.to/4qWgVnS (Why Perfect: Keeps ingredients fresh longer and prevents freezer burn if you want to freeze individual bars for later consumption.)
Professional Variations to Elevate Your Bars
Once you have mastered the Classic Lemon Bars with Shortbread Crust, you can begin to experiment with sophisticated flavor profiles used by pastry chefs. These adaptations respect all dietary restrictions, avoiding pork and alcohol entirely.
Lavender-Infused Shortbread
Adding dried culinary lavender to the crust provides a sophisticated floral aroma. Simply grind a teaspoon of lavender into the sugar before mixing it with the flour and butter. This variation is particularly popular in high-end tea rooms and adds a layer of complexity to the citrus profile.
Tropical Passion Fruit (Lilikoi) Bars
For a tropical twist, replace half of the lemon juice with fresh passion fruit puree. The intense, exotic flavor of the passion fruit pairs beautifully with the buttery crust. You can even add finely chopped macadamia nuts to the shortbread for an added crunch that transports your palate to the islands.
Pink Raspberry Swirl
To achieve a stunning visual and flavor contrast, create a raspberry reduction by simmering fresh berries and straining out the seeds. Swirl this concentrated juice into the lemon filling before baking. It creates a “Pink Lemonade” effect that is entirely natural and free from artificial dyes.
Brown Butter and Sea Salt
Browning your butter, known as beurre noisette, before allowing it to solidify and then using it in the crust adds a deep, nutty richness. Finishing the bars with a light sprinkle of flaky sea salt enhances the contrast between the sweet filling and the savory base, a technique used by top-tier bakeries to balance the palate.

Troubleshooting and Success Tips
Even with a simple recipe, things can sometimes go wrong. If your lemon bars have a cracked surface, it is likely due to overbaking or cooling the bars too quickly. Ensure you pull them from the oven while the center still has a slight jiggle, the residual heat will finish the setting process. If you notice a thin, white “crust” on top of the lemon layer, do not worry, this is a natural occurrence of air bubbles rising during the bake and is easily hidden by a generous dusting of powdered sugar.
To get clean, professional slices, always allow the bars to chill completely. Use a sharp knife and wipe it clean with a damp cloth between every single cut. This prevents the sticky lemon curd from dragging and ruining the sharp edges of your squares. If you find the crust is getting soggy, ensure you are pre-baking the shortbread long enough until it is fully set and slightly golden before adding the liquid filling.
Storage and Longevity
Classic Lemon Bars with Shortbread Crust should always be stored in the refrigerator. Due to the high egg content in the curd, they are perishable and will lose their structural integrity if left at room temperature for more than a few hours. When stored in an airtight container like the Rubbermaid Brilliance Glass set, they will remain fresh for up to five days. For long-term storage, these bars freeze remarkably well. Wrap individual squares tightly and use a FoodSaver Vacuum Sealer to prevent freezer burn. They can be frozen for up to three months, simply thaw in the refrigerator overnight before serving.