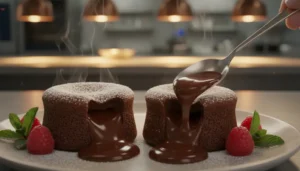
Experience the ultimate chocolate indulgence with these decadent cakes that boast a rich, molten center and a perfectly tender exterior. These Chocolate Lava Cakes, Gooey & Irresistible, are the crown jewel of any dessert menu and surprisingly easy to master at home.
Chocolate Lava Cakes
INGREDIENTS
- 6 oz High-quality dark chocolate (60% cocoa or higher)
- 1/2 cup Unsalted butter
- 2 Large eggs + 2 Large egg yolks
- 1/4 cup Granulated sugar
- 1/8 tsp Salt
- 2 tbsp All-purpose flour
- 1 tsp Vanilla bean paste (Alcohol-free)
- Cocoa powder for dusting ramekins
INSTRUCTIONS
- Preheat oven to 425°F (218°C). Grease four 6-ounce ramekins with butter and dust with cocoa powder.
- Melt the chocolate and butter together using a double boiler or in 30-second intervals in the microwave until smooth.
- In a separate bowl, beat eggs, egg yolks, sugar, salt, and vanilla until thick and pale.
- Gently fold the melted chocolate mixture into the egg mixture.
- Sift the flour over the batter and fold gently until just combined.
- Divide batter among ramekins and bake for 12, 14 minutes until sides are firm but center is soft.
- Cool for 1 minute, then invert onto plates. Serve immediately.
The Fascinating History of the Molten Center
The chocolate lava cake, also known as “molten chocolate cake,” is a modern classic in the world of pastry. Defined by its contrast between a firm, cake-like exterior and a warm, liquid center, it has become a staple of fine dining and casual restaurants alike. However, the origin of this dessert is a subject of friendly but firm debate between two culinary heavyweights. French-American chef Jean-Georges Vongerichten is widely credited with popularizing the dish in the United States in 1987. He claims to have invented it by mistake while working at Restaurant Lafayette in New York City. During a busy service, he pulled a chocolate sponge cake out of the oven too early and discovered the center was still runny. The texture and taste were so exceptional that he refined the “mistake” into a signature dish. On the other hand, French chef Michel Bras claims a more intentional origin, having developed his Biscuit de Chocolat Coulant in 1981 after years of experimentation. Unlike the underbaked method, Bras’s version involved inserting a frozen ganache core into the cake batter to ensure a liquid center every time.
Regardless of which origin story you prefer, the popularity of Chocolate Lava Cakes, Gooey & Irresistible, exploded in the 1990s, moving from elite Manhattan eateries to national chains and eventually into the home kitchen. This dessert represents a perfect marriage of technical precision and pure comfort, making it a favorite for Valentine’s Day, anniversaries, or any occasion requiring a show-stopping finish.
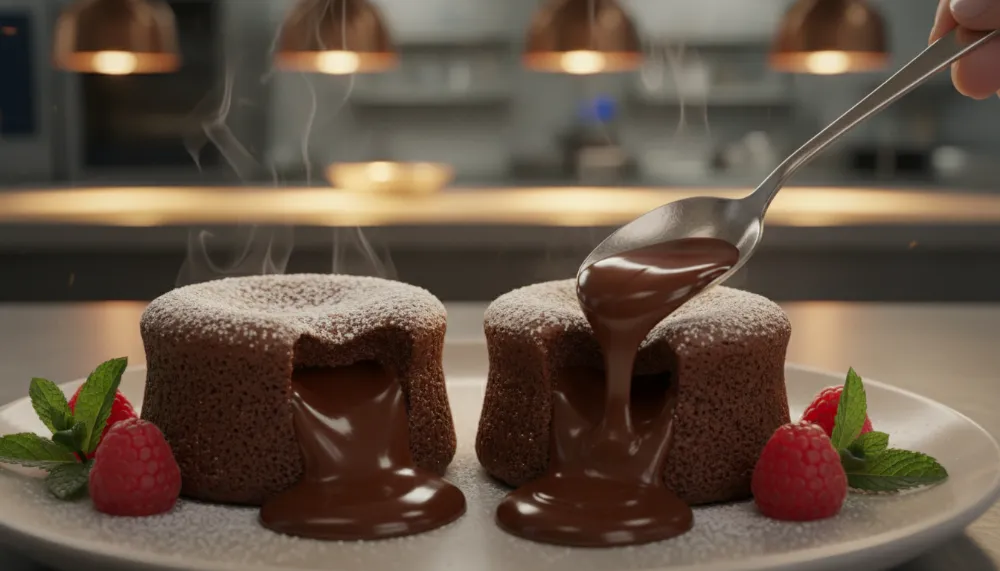
The Science of the Perfect Ooze
To achieve the signature molten center, one must understand the relationship between temperature and structure. The exterior of the cake sets because the flour and egg proteins coagulate, creating a stable wall. However, because the cake is baked at a high temperature for a short duration, the heat does not reach the center fast enough to cook the interior proteins fully. This leaves the middle in a liquid, ganache-like state. Using the Cosori 9-in-1 TurboBlaze Air Fryer 6 Qt is a modern way to achieve this, as its rapid air circulation cooks the outside rapidly while keeping the center perfectly runny. When you cut into it, the lack of a fully developed gluten structure in the center allows the batter to flow out, creating that iconic lava effect.

Essential Equipment for Success
While the recipe seems simple, having the right tools makes a world of difference in the final texture and presentation. Here are my top recommendations for your kitchen:
- Ninja BN751 Professional Plus DUO Blender: https://amzn.to/3LCDyNR (Why Perfect: 1000W motor, perfect for creating smooth fruit coulis or tahini swirls for variations).
- Cosori 9-in-1 TurboBlaze Air Fryer 6 Qt: https://amzn.to/4hRWmVq (Why Perfect: Provides the high, consistent heat needed for the perfect outer crust).
- Cuisinart 8 Cup Food Processor: https://amzn.to/47Nhbg8 (Why Perfect: Excellent for finely chopping high-quality chocolate blocks for even melting).
- Rubbermaid Brilliance Glass Storage Set of 9: https://amzn.to/4oD0YkY (Why Perfect: Great for storing extra batter if you want to bake fresh cakes later).
- FoodSaver Vacuum Sealer Machine: https://amzn.to/4qWgVnS (Why Perfect: Keeps your high-quality chocolate bars fresh and free from moisture).
Choosing Your Chocolate: The 60% Rule
The soul of Chocolate Lava Cakes, Gooey & Irresistible, lies in the quality of the chocolate. Since there are so few ingredients, there is nowhere for low-quality chocolate to hide. I recommend using a bar with at least 60% to 70% cocoa solids. Avoid standard chocolate chips if possible, as they often contain stabilizers that prevent them from melting into a truly fluid “lava.” Instead, use a chef’s grade baking bar and chop it finely with your Cuisinart 8 Cup Food Processor. This ensures the fat content is high enough to provide that silky, luxurious mouthfeel that defines the dish.
Professional Flavor Variations (Alcohol-Free)
While many recipes call for liqueurs, you can achieve world-class flavor profiles using extracts, juices, and spices. These variations elevate the humble lava cake into a gourmet experience:
Mexican Spiced Chocolate
Infuse the batter with a blend of ground cinnamon and a tiny pinch of cayenne pepper. The heat of the spice enhances the richness of the dark chocolate, while the cinnamon provides a warm, aromatic finish that lingers on the palate. This is particularly effective when served with a dollop of cold cream.
Espresso & Sea Salt
Add a concentrated shot of espresso or a teaspoon of high-quality instant coffee powder to the melted chocolate. The bitterness of the coffee deepens the chocolate notes, making it taste “darker” without adding more cocoa. Finish the plated cake with a sprinkle of flaky sea salt to balance the sugar and fat.
Salted Caramel Core
Instead of relying solely on the batter for the center, insert a chilled dollop of thick salted caramel (made with cream and sugar) into the center of the batter before baking. This creates a dual-textured liquid center that surprises the diner with every bite.
Tahini or Peanut Butter Swirl
A professional nutty variation involves folding a small amount of roasted tahini or creamy peanut butter into the center. This adds a savory, earthy element that transforms the dessert into a more sophisticated, less sugary experience. You can use your Ninja Professional Plus DUO Blender to ensure your nut butter is perfectly smooth before adding it to the cake.

The Critical Cooling Minute
One of the most common mistakes home bakers make is trying to unmold the cakes the second they come out of the oven. You must allow them to rest for exactly one minute. This brief resting period allows the outer edges to firm up just enough to support the weight of the molten center during the inversion process. If you flip them too early, the cake may collapse, resulting in a “volcano” where the lava escapes before it hits the plate.
Nutritional Profile: A Decadent Deep Dive
Because it relies on high-quality fats and sugars to achieve its gooey consistency, a standard individual-sized chocolate lava cake is a calorie-dense dessert. A typical 120g serving contains approximately 350 to 450 kcal. The total fat ranges from 22g to 28g, primarily from butter and cocoa butter. While it is a treat, it does offer some micronutrients, notably Iron and Magnesium, due to the high cocoa content. To keep things balanced, serve with fresh raspberries or a tart fruit reduction made in your Ninja Blender to cut through the richness.
Storage and Reheating Tips
Lava cakes are best enjoyed fresh, but you can prepare the batter in advance. Store the filled ramekins in your Rubbermaid Brilliance Glass containers in the refrigerator for up to 24 hours. When you are ready to serve, bake them directly from the fridge, adding 1 to 2 minutes to the total baking time. If you have leftover baked cakes, you can reheat them in the microwave for 15 to 20 seconds, though the center may not be quite as liquid as the first time. For long-term prep, you can even freeze the unbaked batter in the ramekins, ensuring they are sealed tightly with a FoodSaver Vacuum Sealer to prevent any freezer burn or odor absorption.