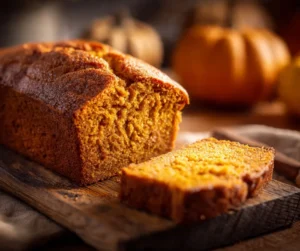
Hi there, fellow food lovers! Lauren Saunders here, and today we’re diving into a question that’s probably crossed every baker’s mind after pulling a glorious peach pie from the oven: ‘How long does homemade peach pie last?’ It’s a fantastic question, because after all that joyful, messy, delicious effort, you want to savor every single slice. And let’s be honest, nobody wants a grilled cheese disaster repeat with their precious peach pie!
Peach pie, with its juicy, sweet filling and flaky crust, is a quintessential summer dessert. But unlike some of our more robust culinary creations, pies can be a bit finicky when it comes to shelf life. We’ll explore the factors that influence how long your homemade peach pie stays fresh, the best ways to store it, how to tell if it’s gone bad, and some clever tips to extend its deliciousness. So, grab a slice (if you still have one!), and let’s get into the sweet science of peach pie longevity.
Table of Contents
Factors Affecting Peach Pie Shelf Life
Just like a perfectly ripe peach, a homemade peach pie has a peak freshness window. Several elements play a role in how long your pie will remain a delightful treat before it starts to turn. Understanding these factors is key to maximizing your pie’s lifespan and ensuring every bite is as good as the first.
1. Ingredients:
The quality and type of ingredients you use significantly impact shelf life. Fresh, ripe peaches are wonderful, but their high moisture content can contribute to a shorter shelf life compared to pies made with less watery fillings. The type of thickener used (flour, cornstarch, tapioca) also matters; some can help bind moisture more effectively, slowing down spoilage. For instance, a pie with a very runny filling might spoil faster due to excess moisture promoting bacterial growth.

2
Travel Shower Kit
Buy it now on Amazon
Vitamin C Serum
Buy it now on Amazon
C15 Super Booster
Buy it now on Amazon
. Baking Process:


A thoroughly baked pie, especially one with a well-cooked filling and a golden-brown crust, tends to last longer. Proper baking reduces the moisture content in the filling and creates a barrier with the crust, inhibiting microbial growth. An underbaked pie, on the other hand, retains more moisture, making it a more hospitable environment for spoilage.
3. Storage Conditions:
This is perhaps the most critical factor. Temperature, humidity, and exposure to air all influence how quickly your pie deteriorates. We’ll delve into specific storage methods shortly, but generally, cooler temperatures and less exposure to air are your pie’s best friends.
4. Presence of Dairy or Eggs:
While traditional peach pie often doesn’t contain dairy or eggs in the filling, some variations might. Pies containing ingredients like milk, cream, or eggs (especially if not fully cooked) are more perishable and require refrigeration to prevent the rapid growth of bacteria like Salmonella.

5. Cross-Contamination:
Even if your pie is perfectly baked, improper handling can introduce bacteria. Always use clean utensils, hands, and surfaces when preparing and serving your pie to avoid cross-contamination from other foods.
6. Acidity of the Filling:
Peaches are naturally acidic, which can act as a mild preservative. However, this acidity alone isn’t enough to prevent spoilage indefinitely, especially when combined with sugars and starches that provide nutrients for microorganisms.
Understanding these variables helps us appreciate why a peach pie isn’t a set-it-and-forget-it kind of dessert. It’s a living, breathing (well, not quite!) culinary creation that needs a little care to stay at its best.
Storing Homemade Peach Pie
Now that we understand what makes a pie tick (or, well, spoil), let’s talk about the nitty-gritty of keeping it fresh. The way you store your homemade peach pie is paramount to its longevity and, more importantly, its safety. Different storage methods offer varying degrees of preservation, and choosing the right one depends on how quickly you plan to devour that delicious creation.
Room Temperature Storage
Ah, the classic countertop pie. There’s something undeniably charming about a pie cooling on the counter, filling the kitchen with its sweet aroma. For many fruit pies, including peach pie, storing at room temperature is generally acceptable for a short period, especially if it’s going to be eaten within a day or two. The high sugar content and acidity of the fruit act as natural preservatives to some extent. However, it’s crucial to consider a few things:
- Duration: A homemade peach pie can typically be left at room temperature (around 68-72°F or 20-22°C) for up to 2 days. Beyond that, the risk of bacterial growth increases, and the quality of the pie will start to decline significantly. The crust might become soggy, and the filling could start to ferment or develop off-flavors.
- Covering: To protect your pie from dust, insects, and excessive air exposure (which can dry out the crust), loosely cover it with aluminum foil or plastic wrap. Avoid sealing it tightly, as this can trap moisture and encourage mold growth, especially if the pie is still warm. A pie dome or an inverted bowl also works wonderfully.
- Location: Choose a cool, dry spot away from direct sunlight or heat sources (like a warm oven or stovetop). Heat accelerates spoilage, so a pantry or a cooler corner of your kitchen is ideal.
- When to Avoid: If your kitchen is particularly warm and humid, or if your pie contains dairy or eggs in the filling (which is less common for traditional peach pie but worth noting for variations), room temperature storage is not recommended. In such cases, refrigeration is the safer bet.
While room temperature storage offers convenience and preserves the texture of the crust best, it’s a short-term solution. For longer preservation, we need to chill out a bit.

Refrigeration
For extending the life of your homemade peach pie beyond a couple of days, refrigeration is your best friend. The cooler temperatures significantly slow down the growth of bacteria and mold, keeping your pie fresh and safe for longer.
- Duration: When properly refrigerated, homemade peach pie can last for 3 to 5 days. This is the recommended storage method if you don’t plan on finishing the pie within 48 hours.
- Preparation for Refrigeration: Allow the pie to cool completely at room temperature before refrigerating. Placing a warm pie directly into the fridge can create condensation, leading to a soggy crust and potentially promoting bacterial growth. Once cooled, cover the pie loosely with plastic wrap or aluminum foil. Again, avoid airtight seals initially, as some residual warmth can still create condensation. After an hour or two in the fridge, you can tighten the seal if you wish, but a loose cover is often sufficient.Takeya Patented Deluxe Cold Brew Iced Coffee Maker Buy it now on AmazonSecond Life: Having a Child in the Digital Age Buy it now on AmazonPaula’s Choice 2% BHA Liquid Exfoliant Buy it now on Amazon
- Placement in the Refrigerator: Store the pie on a flat surface in the main compartment of your refrigerator. Avoid placing it in the door, as temperatures there tend to fluctuate more. Keep it away from strong-smelling foods, as pies can absorb odors.
- Reheating (Optional): If you prefer a warm slice of pie, you can gently reheat refrigerated peach pie. A common method is to place individual slices in a microwave for 30-60 seconds, or the entire pie in a preheated oven at 350°F (175°C) for 15-20 minutes, or until warmed through. Be mindful not to overheat, as this can dry out the crust or make the filling too runny.


While refrigeration is excellent for extending freshness, it can sometimes affect the texture of the crust, making it a bit less crisp. However, the trade-off for extended shelf life and food safety is usually worth it.
Freezing
For the ultimate long-term storage solution, freezing is your go-to method for homemade peach pie. This is perfect if you’ve made multiple pies, want to prepare ahead for a special occasion, or simply can’t finish a whole pie within the refrigeration window. Freezing effectively halts microbial activity, preserving your pie for months.
- Duration: A properly frozen homemade peach pie can last for 6 to 8 months, and sometimes even up to a year, without significant loss of quality. While it might technically be safe to eat beyond this, the flavor and texture can start to degrade.
- Preparation for Freezing:
- Cool Completely: Just like with refrigeration, ensure your pie is completely cooled to room temperature before freezing. This prevents ice crystals from forming, which can lead to a soggy crust upon thawing.
- Wrap Thoroughly: This is crucial for preventing freezer burn and absorbing freezer odors. First, wrap the entire pie (or individual slices) tightly in plastic wrap. Make sure there are no exposed areas. Then, add a second layer of aluminum foil. For extra protection, you can place the wrapped pie in a freezer-safe bag or an airtight container.Lash Enhancing Serum Buy it now on AmazonBaby Bottle Sterilizer and Dryer Buy it now on AmazonCrack’em Egg Cracker & Spoon Rest Buy it now on Amazon
- Label and Date: Always label your frozen pie with the date it was frozen. This helps you keep track of its freshness and ensures you consume it within the recommended timeframe.
- Freezing Whole Pies vs. Slices:
- Whole Pies: If freezing a whole pie, it’s often best to freeze it unbaked if possible, as the crust tends to hold up better. However, baked pies can also be frozen successfully. If freezing a baked pie, consider freezing it on a baking sheet until solid before wrapping to prevent damage to the crust.
- Individual Slices: Freezing individual slices is incredibly convenient for portion control. Wrap each slice separately as described above.
- Thawing and Reheating:
- Thaw Slowly: For best results, thaw frozen pie (whole or slices) in the refrigerator overnight. Avoid thawing at room temperature, as this can encourage bacterial growth.
- Reheat: Once thawed, you can reheat the pie to restore its crispness and warmth. For a whole pie, bake in a preheated oven at 350°F (175°C) for 20-30 minutes, or until heated through and the crust is crisp. For individual slices, a toaster oven or conventional oven works well for about 10-15 minutes. Microwaving is an option for slices, but it may result in a softer crust.


Freezing is an excellent way to preserve the taste of summer peaches for months to come, allowing you to enjoy homemade peach pie long after peach season has ended. Just remember the key is proper wrapping to protect against freezer burn!
Recognizing Spoilage
Even with the best storage practices, it’s essential to know how to tell if your homemade peach pie has gone bad. Eating spoiled food can lead to foodborne illness, and nobody wants that after all the effort of baking! Here are the key indicators to look out for:
- Visual Cues:
- Mold Growth: This is the most obvious sign. Any fuzzy spots, regardless of color (green, white, black), indicate mold and mean the pie should be discarded immediately. Mold can spread below the surface, so don’t just scrape it off.
- Discoloration: The peach filling might darken significantly or develop unusual spots that weren’t there when it was fresh. The crust might also show signs of unusual discoloration.
- Slimy or Mushy Texture: The filling, which should be firm but tender, might become slimy or excessively watery and mushy.
- Odor:
- Sour or Off Smell: Fresh peach pie has a sweet, fruity aroma. If you detect any sour, yeasty, alcoholic, or otherwise unpleasant odors, the pie has likely spoiled. This is often due to fermentation or bacterial growth.
- Rancid Smell: If the crust contains butter or other fats, a rancid smell can indicate that the fats have oxidized and gone bad.
- Texture Changes:
- Excessive Softness or Hardness: While a slightly softer crust is expected with refrigeration, an overly soggy, mushy, or unusually hard crust can be a sign of spoilage.
- Bubbling or Fermentation: If you notice any bubbling in the filling, it’s a strong indicator of fermentation, meaning yeast or bacteria are actively breaking down the sugars.
- Taste (Use with Caution): While visual and olfactory cues are usually sufficient, if you’re ever in doubt and decide to taste, take a very small bite from an inconspicuous area. Any off-flavors, sourness, or bitterness means the pie is spoiled. However, it’s always safer to err on the side of caution and discard if you have any doubts.
Remember, when in doubt, throw it out! It’s better to be safe than sorry, especially with homemade goods that don’t contain the same preservatives as store-bought items. Your health (and taste buds) will thank you.
Tips for Extending Shelf Life
We’ve covered how long your peach pie lasts and how to spot when it’s past its prime. Now, let’s talk about some proactive steps you can take to give your delicious creation the longest, happiest life possible. Think of these as little acts of love for your pie, ensuring every slice is as fresh and delightful as the first.
- Bake Thoroughly: This might seem obvious, but an underbaked pie is a soggy pie, and a soggy pie spoils faster. Ensure your crust is golden brown and the filling is bubbling thickly. A well-baked pie has less free moisture, which means less opportunity for unwanted microbial guests to set up shop.
- Cool Completely Before Storing: I can’t stress this enough! Patience is a virtue, especially when it comes to pie. Warm pie creates condensation when covered, turning your beautiful, flaky crust into a sad, soggy mess and creating a humid environment that’s a breeding ground for bacteria. Let it cool on a wire rack for several hours, or even overnight, before covering or refrigerating.
- Use a Reliable Thickener: Cornstarch, tapioca, or flour are common thickeners for fruit pies. Using the right amount ensures your filling sets properly, reducing excess moisture. Some bakers even prefer to pre-cook their fruit filling slightly to reduce water content before baking, especially with very juicy fruits like peaches.
- Consider a Top Crust Vent: If you’re making a double-crust pie, make sure to cut vents in the top crust. This allows steam to escape during baking, preventing a soggy bottom crust and ensuring the filling cooks evenly and reduces moisture.
- Store in the Right Place: As we discussed, room temperature for a day or two, refrigeration for up to five days, and freezing for months. Choose the storage method that aligns with when you plan to enjoy your pie. Don’t leave it out on the counter for days if you only plan to eat a slice a week!
- Protect from Air and Odors: While you want to avoid trapping moisture, you also want to protect your pie from drying out and absorbing refrigerator odors. Once completely cooled, a loose cover of foil or plastic wrap is usually sufficient. For longer refrigeration, a pie carrier or airtight container can offer better protection.
- Serve with Clean Utensils: Always use a clean pie server or knife when cutting and serving. Introducing crumbs or other food particles can accelerate spoilage.
- Individual Portions for Freezing: If you know you won’t eat the whole pie quickly, consider freezing individual slices. This makes thawing and reheating much more convenient and reduces the number of times the entire pie is exposed to temperature changes.
By following these simple tips, you can ensure your homemade peach pie remains a delightful treat for as long as possible, allowing you to savor every last crumb of your hard work!
Conclusion
So, how long does homemade peach pie last? The short answer is: it depends! But with the insights we’ve shared, you’re now equipped to make informed decisions that will keep your delicious creation at its best